Roof leaks can lead to significant water damage if not identified and addressed promptly. Understanding how to spot water damage caused by a roof leak and knowing the appropriate steps to take afterward can save homeowners time, money, and stress. Below are key guidelines for determining water damage and actionable steps to mitigate the issue.
Common Signs of Water Damage
Water damage resulting from a roof leak is not always immediately visible.
- Water Stains on Ceilings or Walls: Yellowish-brown discoloration often appears in irregular shapes, signaling trapped moisture seeping through drywall.
- Peeling Paint or Wallpaper: Excessive moisture can cause paint or wallpaper to blister, peel, or warp.
- Sagging Ceiling: A drooping ceiling may indicate that water has pooled above it due to a prolonged leak.
- Visible Mold Spots: Black, green, or white mold growth on walls or ceilings is often an indicator of persistent moisture problems stemming from leaks.
- Unpleasant Odors: A damp, musty smell in certain areas of your home can signal hidden water accumulation caused by roof leaks.
Steps to Take After Discovering Water Damage
Once you’ve determined that water damage is present in your home due to a roof leak, taking swift action is crucial.
- Use buckets or containers to catch dripping water from the ceiling.
- Move furniture and belongings away from affected areas.
- Lay down towels or plastic sheeting to protect flooring.
- Take photos and videos of visible damage for insurance purposes.
- Keep written notes detailing any impacted areas in your home.
- Inspect both the interior (e. g. , attic) and exterior (e. g. , roofing shingles) for clues about where the leak originates.
- Pay close attention around chimneys, skylights, vents, flashing, and gutters – these are common problem areas.
- Use dehumidifiers or fans to dry out damp areas.
- Open windows when possible to improve airflow.
- Call a Professional Roofer for Repairs
While minor leaks might seem manageable as a DIY project, it’s best to consult with an experienced roofer for proper evaluation and repair services.
Preventing Future Water Damage
| Prevention Tip | Description |
| Regular Inspections | Schedule roof inspections at least twice annually—once in spring and fall—to catch potential issues early on. |
| Maintain Gutters | Clean gutters regularly so they don’t become clogged with debris that could lead rainwater back onto your roof surface. |
| Inspect Attic Periodically | Monitor for signs such as damp insulation which could imply undetected small leaks overtime. |
Detecting Roof Leaks: Tips from a Minneapolis MN Roofing Contractor
Roof leaks can cause significant damage if left unaddressed, so identifying the early signs is crucial for preventing costly repairs. Many homeowners overlook subtle indicators of roofing issues, which can lead to extensive problems over time.
One of the clearest signs of a roof leak is the appearance of water stains. These often appear as yellow, brown, or rust-colored patches on your ceilings or walls. The shape may vary from small spots to larger irregular rings.
- Corners where ceilings meet walls
- Directly beneath roof fixtures like vents or skylights
- Around chimneys or other protrusions
Excess moisture caused by a roof leak often affects interior surfaces such as paint and wallpaper.
– Bubbling wallpaper
– Warping or swelling in drywall
These issues not only indicate a potential roofing problem but also highlight moisture retention within your home.
A more obvious sign of a roof leak is noticing active dripping water during rainfall. While this may seem straightforward, not every drip directly correlates to the source above it on the roof—it could be traveling along beams or insulation before becoming visible.
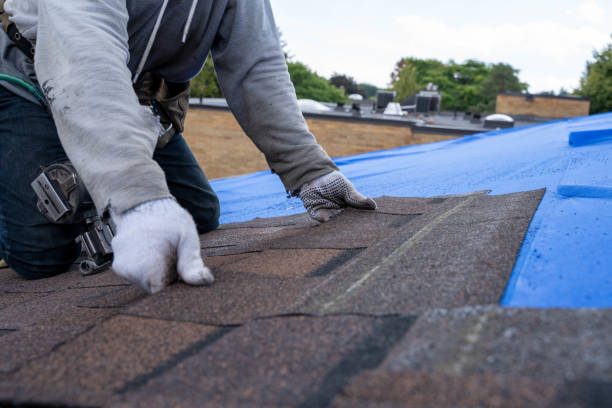
Inspecting your roof’s exterior can reveal potential vulnerabilities that lead to leaks: – Missing shingles:Exposed areas leave roofs susceptible to water seepage.Damaged flashing:Flashing around chimneys, vents, and skylights prevents leaks; cracks or deterioration here are red flags.
Mold thrives in damp environments created by persistent leaks.
– A musty odor in certain rooms
– Mold growth near windowsills
Mold isn’t just unsightly—it poses serious health risks if left untreated.
Steps to Take if You Notice These Signs from a Minneapolis MN Roofing Contractor
Once you’ve identified potential indicators of a roof leak, it’s essential to act promptly.
- Document all visible damage: Take photos for insurance purposes and future reference.
- Inspect your attic: Check for wet insulation, wood rot, or other hidden signs.
- Locate and trace the source: If possible (and safe), inspect your roof’s exterior for damaged areas.
- Contact a professional roofer: Some issues require expertise; professionals can conduct thorough inspections and repairs.
- Use buckets or tarps to catch dripping water temporarily.
- Relocate valuables away from affected spaces.
By recognizing these common signs early and taking appropriate action quickly, you can minimize further damage and extend the lifespan of your home’s roofing system effectively.
Comprehensive Guide to Minneapolis MN Roof Replacement and Leak Indicators
| Sign | Description | Potential Cause | Suggested Action |
| Water Stains | Yellow/brown discoloration on ceilings/walls | Leak from damaged shingles/flashing | Contact a roofer; inspect attic |
| Peeling Paint/Wallpaper | Moisture buildup inside walls | Prolonged exposure to leaking water | Identify source; repair affected area |
| Mold Growth | Musty smell/visible black spots | Persistent dampness | Address leak; consult mold specialist |
| Missing Shingles | Bare patches on exterior | High winds/storm-related damage | Replace missing shingles |
By addressing these indicators proactively, homeowners can save money while safeguarding their property from ongoing structural damage caused by undetected leaks over time.
Signs You Need Minneapolis MN Roof Repair: Water Stains, Peeling Paint, and More
Roof problems often reveal themselves through various visual clues inside and outside your home. Recognizing these early indicators can help you act promptly, preventing minor issues from escalating into costly repairs or extensive damage.
Common Interior Signs of Roof Issues
- Water stains typically appear as discolored patches on interior surfaces.
- These stains are often brownish-yellow and may have irregular borders.
- They suggest water has penetrated through the roof, soaking into drywall or plaster.
- Moisture behind walls or ceilings weakens adhesion, causing paint to peel or bubble.
- This is a strong indicator of persistent leaks that need immediate attention.
- A sagging ceiling suggests water pooling above it due to an ongoing leak.
- This can become a structural hazard if left untreated.
- Mold thrives in damp areas caused by leaks in the roof structure.
- Look for dark spots around corners, baseboards, and near water stains.
Common Exterior Signs of Roof Problems
- Damaged shingles allow water to seep beneath the roof surface.
- This is especially common after storms with high winds or hail.
- Flashing prevents water from entering at seams where different materials meet.
- Corrosion, cracks, or missing flashing compromise this protection.
- Clogged gutters prevent proper drainage during rainstorms.
- Overflowing gutters can lead to water backing up onto the roof surface.
- A sagging section in your roofline could indicate structural damage caused by prolonged exposure to moisture.
Practical Steps to Address Potential Roof Issues
- Conduct a thorough inspection: Check areas like attics for hidden damage such as damp insulation.
- Document findings: Take photos of damage as evidence for discussions with professionals or insurance claims.
- Contact a roofing contractor: Engage certified professionals to assess the extent of the issue and recommend repairs.
- Prevent further damage: Use temporary solutions like tarps while waiting for professional assistance if severe leaks are present.
- Schedule regular maintenance: Regular inspections can detect problems before they worsen.
| Interior Issue | Possible Cause | Recommended Action |
| Water stains | Minor leak | Schedule a professional inspection |
| Peeling paint | Prolonged moisture exposure | Repair leak; repaint once dry |
| Mold presence | Moisture buildup over time | Fix leak; consult mold remediation experts |
Recognizing these warning signs early is critical for protecting both your home’s structure and its occupants’ safety. By addressing potential issues promptly, you can extend the lifespan of your roof while avoiding significant expenses down the road.
Signs You May Need Minneapolis MN Roof Installation: Water Stains, Peeling Paint, and More
Detecting the early signs of roof damage can save you from costly repairs down the line. Water stains, peeling paint, and other visible issues may seem minor at first glance but often point to more significant underlying problems. Understanding these indicators can help you take prompt action while preventing further damage to your home.
Common Signs of Roof Issues
- Water Stains on Ceilings or Walls
Brown, yellowish, or discolored spots on ceilings and walls are among the most common signs of water intrusion caused by a leaky roof. These stains may start small and grow over time if left unaddressed. - Peeling or Bubbling Paint
Excess moisture trapped behind walls or ceilings can cause paint to peel, bubble, or crack. This issue often occurs when water finds its way into your home through damaged roofing materials. - Sagging Ceiling Areas
If parts of your ceiling appear to sag or droop, this could indicate water pooling above due to a persistent roof leak. - Musty Odors
Persistent dampness from a leaking roof can foster mold and mildew growth, leading to unpleasant odors in certain areas of your home. - Cracked or Warped Drywall
Exposure to water over time can cause drywall surfaces to crack, warp, or deteriorate. This is another indicator of potential roof-related problems.
Additional Indicators Outside the Home
Sometimes roof issues are more apparent when inspecting external areas.
- Missing Shingles: Gaps in the shingles expose your roof’s underlayment and leave it vulnerable to leaks.
- Damaged Flashing: Flashing around chimneys, vents, and skylights can degrade over time. Cracks or gaps in flashing allow water to seep through these vulnerable points.
- Clogged Gutters: A buildup of debris in gutters not only prevents proper drainage but also creates stagnant pools that can lead to roofing damage over time.
Why Prompt Action is Necessary
- Extensive structural damage
- Mold growth affecting air quality
- Higher repair costs as minor leaks worsen
- Decreased property value
Steps You Can Take Immediately
- Document areas showing visible damage (take photos).
- Inspect nearby spaces such as attics for additional issues like damp insulation or mold patches.
- Contact a professional roofer for an evaluation—DIY solutions often provide only temporary fixes.
- Repair interior damage after addressing the root cause (the damaged roof).
| Indicator | Possible Cause | Recommended Action |
| Water stains | Leaky shingles/flashing | Call a professional roofer |
| Peeling/bubbling paint | Moisture behind surfaces | Repair source & repaint |
| Sagging ceilings | Long-term undetected leak | Inspect attic & address leak |
| Musty odors | Mold/mildew due to dampness | Evaluate ventilation & leaks |
Taking proactive steps helps protect both the functionality and aesthetics of your property while reducing long-term expenses related to neglected roofing concerns.
How to Inspect Your Attic and Insulation for Hidden Roof Damage
Inspecting your attic and insulation is a critical step in identifying hidden roof damage that may not be visible from the exterior. Roof leaks can lead to long-term structural problems and increased energy costs if left undetected. Here’s a comprehensive guide on how to conduct an effective inspection of your attic and insulation.
Before you begin, ensure you have the necessary tools and safety equipment: – A flashlight or headlamp with strong illumination – Protective gloves for handling insulation materials – A dust mask to avoid inhaling particles – A sturdy ladder to access the attic safely
Wear clothing that protects your skin, as attics can sometimes contain debris or hazardous materials.
Water stains are one of the most common indicators of roof leaks within an attic. Focus on areas around: – Joists and rafters: Look for discoloration, stains, or dampness. – Chimney flashing: Check the base of chimneys where moisture often seeps in. – Vents and skylights: Inspect areas around penetrations in the roof structure.
Use your flashlight to shine light into darker corners where water might collect unnoticed.
Insulation plays a vital role in maintaining energy efficiency; however, it can also retain water when a leak occurs. Signs of damage include: – Wet or compressed insulation: Moisture depletes its effectiveness. – Mold growth: Appears as black, green, or white patches on or near insulation material. – Musty odors: A strong indicator that moisture has been trapped over time.
If you detect wet insulation, remove it promptly but carefully to prevent mold from spreading further.
| Type | Signs of Damage | Action Needed |
| Fiberglass Batts | Dampness, clumping | Replace affected sections |
| Spray Foam | Discoloration or softened texture | Consult a professional for repairs |
| Loose-Fill Cellulose | Settling, dark patches | Remove damaged material immediately |
Roof leaks can weaken wooden structures within the attic over time. During your inspection: – Observe beams and rafters: Look for warping, rotting wood, or cracks. – Assess nails and fasteners: Rusted hardware signals prolonged exposure to moisture.
Signs of extensive structural damage may require consultation with a roofing contractor or carpenter.
Improper ventilation exacerbates hidden roof damage by trapping moisture in your attic space.
A properly ventilated attic reduces humidity levels and minimizes mold growth caused by leaks.
What to Do Next if You Find Roof Damage
If you discover evidence of hidden roof problems during your inspection: 1. Document the damage by taking photos – this will be useful for insurance claims. 2. Mitigate further harm by addressing immediate risks (e. g. , replacing wet insulation). 3. Contact a professional roofer for repair solutions tailored to the severity of the issue.
Regular inspections of your attic can help prevent costly repairs while maintaining the overall health of your home’s roofing system. By catching hidden problems early, you protect both your investment and indoor living environment effectively.
Evaluating the Structural Integrity of Your Roof After a Leak is Discovered
Maintaining the structural integrity of a roof is vital for the safety and longevity of your home. After discovering a roof leak, it’s crucial to assess whether the underlying structure has been compromised. Ignoring structural damage can lead to costly repairs, reduced property value, and potential hazards over time.
Assess Visible Damage Indoors
Start by examining interior spaces where water damage has been identified.
- Sagging ceilings:This indicates that water may have collected in certain areas, weakening the structural framework.
- Cracks in walls or ceilings:Water infiltration can cause materials like drywall or plaster to shift or break apart.
- Persistent dampness:Prolonged exposure to moisture can weaken beams and other structural components.
Inspect Wooden Components
Wooden structures such as rafters, joists, and sheathing are especially vulnerable to water damage.
- Rotting wood: Check for soft spots or crumbling wood fibers.
- Warping: Inspect for bent or twisted wood beams that may no longer support weight effectively.
- Discoloration: Dark streaks or spots on wood surfaces can signal prolonged exposure to moisture.
If you notice extensive rotting or warping, it’s best to consult a professional roofer immediately.
Examine Metal Connectors and Fasteners
- Look for signs of corrosion, such as rusting or discoloration.
- Ensure fasteners are still tightly secured; loose hardware can signal shifting in the structure due to water damage.
Replacing damaged fasteners promptly helps maintain stability.
Evaluate Roof Decking Stability
The roof decking forms an integral part of your home’s structural support system.
- Access your attic space (if safe) and check for any sagging or bowing of the decking panels.
- Use gentle pressure with your hand—if it feels spongy, this indicates water saturation and decay.
- Look for mold growth along decking surfaces, as this compromises both stability and air quality inside your home.
Consider Potential Mold Growth in Insulation
Leaks often allow water into insulation materials within walls or attics. This trapped moisture creates ideal conditions for mold growth that could impact surrounding structures while also posing health risks. Insulation should be replaced if it appears wet or shows visible signs of mold contamination.
When Should You Call a Professional?
| Signs That Warrant Professional Inspection | Reason |
| Persistent sagging areas | Risk of collapse due to weakened supports |
| Widespread rot on wooden components | May require replacement of critical load-bearing elements |
| Extensive mold coverage | Health hazard requiring specialized remediation |
Licensed contractors use tools like moisture meters and thermal imaging cameras to detect hidden issues beyond what is visible during an initial inspection.
Prevent Future Issues
- Schedule routine roof inspections annually.
- Ensure proper attic ventilation to reduce moisture buildup.
- Repair minor roofing problems promptly before they escalate into larger leaks.
By proactively addressing leaks and evaluating their impact on your roof’s structure, you secure long-term safety and minimize repair costs over time.

Inspecting the Exterior of Your Roof to Pinpoint Potential Problem Areas
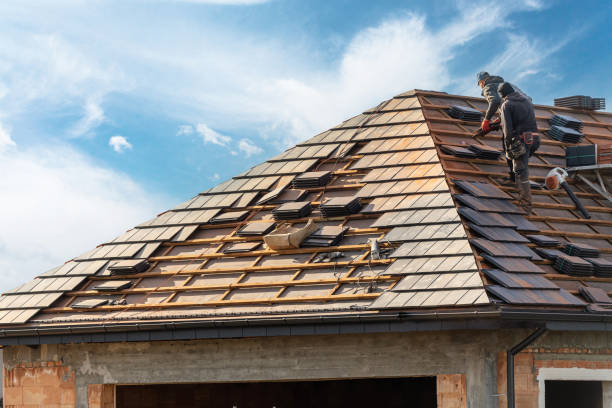
Regular roof inspections are crucial for identifying potential issues before they develop into costly repairs. By carefully examining the exterior of your roof, you can pinpoint areas that may be vulnerable to leaks or other structural problems. Below is a guide on how to effectively inspect your roof’s exterior and detect potential problem areas.
Tools and Safety Precautions
- Ladder (ensure it’s stable and placed on even ground)
- Binoculars (for inspecting hard-to-reach areas)
- Flashlight (for shaded or poorly lit sections)
- Roofing gloves
- Chalk or marker to note problem areas
- Avoid inspecting during wet or windy weather.
- Always wear protective footwear with good grip.
- If climbing on the roof, use a harness for added security.
Key Areas to Inspect on Your Roof
- Look for cracked, curled, or missing shingles.
- Check for granule loss on asphalt shingles, which appears as excessive debris in gutters.
- Pay attention to discoloration or dark patches that may indicate water pooling.
- Inspect metal flashing around chimneys, vents, skylights, and valleys.
- Ensure there are no gaps, corrosion, or loose pieces that could allow water penetration.
- Look for signs of sagging or rotting wood along the edges.
- Check for water stains under the eaves that might signal improper drainage.
- Clear debris like leaves and twigs from gutters.
- Observe if water flows smoothly through downspouts without overflowing.
- Check seams where gutters connect for leaks or damage.
- Inspect soffits (underneath overhanging sections) for moisture damage or holes caused by pests.
- Examine fascia boards (along edges) for warping, peeling paint, or rot.
- Check seals around plumbing vents and HVAC systems.
- Ensure rubber boots at vent bases are intact without cracks.
- The ridge caps should sit flush without gaps where rain can enter.
- Valleys—where two slopes meet—are prone to water pooling; ensure they’re clear of debris.
Signs of Potential Issues
| Problem | Indicators | Possible Cause |
| Water Stains | Dark spots near flashing or eaves | Faulty flashing or clogged gutters |
| Mold Growth | Black/green patches near roof edges | Excessive moisture |
| Rusted Flashing | Orange discoloration | Prolonged exposure to water |
| Cracked Shingles | Visible splits | Aging materials |
| Standing Water | Pools in valleys | Poor drainage |
When Professional Help is Needed
- Structural damage such as sagging roofs
- Significant mold growth indicating prolonged water exposure
- Advanced flashing deterioration needing skilled repair
By addressing minor problems early through regular inspection of your roof’s exterior, you can extend its lifespan while avoiding expensive repairs later.
Inspecting the Exterior of Your Roof to Pinpoint Potential Problem Areas
A comprehensive roof inspection is the first step in identifying problem areas and preventing costly repairs. Regularly inspecting the exterior of your roof not only helps uncover existing damage but also allows you to address issues before they escalate. Here’s a guide on how to carry out an effective roof inspection like a professional.
Before inspecting your roof, prioritize safety:
– Use a sturdy ladder and ensure it is placed on level ground.
– Avoid inspecting during bad weather conditions, such as rain or strong winds.
– Wear appropriate footwear with a good grip to prevent slipping.
- Missing or Damaged Shingles: Look for cracked, curled, or completely missing shingles, which may leave your roof vulnerable to water penetration.
- Granule Loss: Check for excessive granules in your gutters or on the ground near downspouts—this could indicate that shingles are nearing the end of their lifespan.
- Damaged Flashing: Inspect areas around chimneys, vents, and skylights where flashing might be corroded or improperly sealed. Such damage can lead to leaks over time.
- Sagging Areas: A sagging roofline might be a sign of structural damage caused by moisture buildup or rotten roofing materials.
- Debris Accumulation: Leaves, branches, and other debris can clog gutters and trap moisture on the roof surface, leading to water damage.
| Component | What to Check | Signs of Damage |
| Gutters & Downspouts | Ensure proper attachment; look for clogs | Water overflow during rain; rusting |
| Vent Boots | Seal around vent pipes | Cracks or gaps allowing water infiltration |
| Chimney Cap & Mortar | Overall condition | Missing mortar; cap cracks |
| Soffit & Fascia | Integrity of edges under eaves | Rotted wood; peeling paint |
If climbing onto your roof poses risks or if certain spots are inaccessible (e. g. , steep angles), use binoculars from the ground level to inspect hard-to-reach sections effectively.
Keep in mind that different weather patterns can cause specific types of damage: – Winter: Ice dams can form at eaves and cause leaks due to melted snow refreezing.Spring/Fall: Heavy rains may expose weak spots where water pools.Summer: UV rays can cause wear-and-tear on roofing materials over time.
While some minor issues like clearing debris can be handled yourself, seek professional help in cases such as: – Widespread shingle loss. – Evidence of structural instability (e. g. , sagging). – Persistent leaks despite initial repairs.
Routine external inspections are essential for maintaining your roof’s longevity and structural integrity. By addressing potential problem areas proactively, you’ll save time and money while protecting one of your home’s most critical components from further deterioration.
- Minneapolis Roofer Tips: A Comprehensive Guide to Roofing Replacement
- The Complete Guide to Choosing a Minneapolis MN Roofing Contractor for Your Roof Replacement
- How a Minneapolis Roofer Can Help Identify Water Damage from a Roof Leak and What to Do Next
- Thorough Guide to Minneapolis MN Roof Replacement and Inspecting for Leaks
- Key Factors to Consider When Choosing a Minneapolis MN Roofing Contractor
- Comprehensive Guide to Minneapolis MN Roof Repair and Installation Process
- Understanding Minneapolis MN Roof Installation: When to Replace Your Roof, Signs, and Costs