Replacing a roof is one of the most significant investments a homeowner can make, and ensuring the process is done right is critical to protecting your home’s structural integrity and value. Whether you’re dealing with an old, worn-out roof or severe weather damage, understanding the essentials of roofing replacement will ensure you get long-lasting results.
Why Replace Your Roof?
A properly functioning roof does more than just shield your home from the elements.
- Protects against water damage and mold growth.
- Improves energy efficiency by maintaining better insulation.
- Enhances your home’s curb appeal and resale value.
- Ensures the safety and comfort of your family.
When roofs start to show signs of wear—such as missing shingles, leaks, or sagging—it may be time to consider replacement instead of frequent repairs.
Key Types of Residential Roofing Materials
Choosing the right roofing material is essential for durability and aesthetic appeal.
| Roofing Material | Durability (Years) | Advantages | Considerations |
| Asphalt Shingles | 20–30 | Affordable, widely available | Less eco-friendly |
| Metal Roofing | 40–70 | Long lifespan, energy-efficient | Higher upfront cost |
| Clay Tiles | 50–100 | Fire-resistant, durable | Heavyweight; may require extra support |
| Wood Shakes/Cedar Shingles | 20–40 | Natural appearance | Requires regular maintenance |
| Slate | 75–150 | Extremely durable, elegant | Expensive; delicate installation |
Take into account factors like climate, budget, and architectural style when selecting materials.
Steps for a Successful Roof Replacement
- Initial Inspection
A licensed roofing contractor should perform a thorough inspection to assess the condition of your existing roof. This helps identify potential issues such as water damage or weak supports before replacement begins. - Selecting Materials
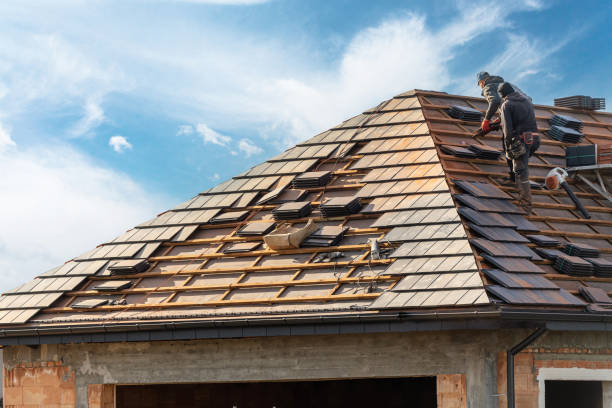
Based on your preferences, budget, and climate conditions, choose roofing materials that suit your home. Keep in mind both functionality and aesthetics during this stage. - Removing Old Roofing
Before installing new materials, contractors will remove old shingles or tiles down to the underlying deck. Proper disposal of old materials ensures compliance with environmental regulations. - Repairing the Roof Deck
Once exposed, any damaged areas in the decking are repaired or replaced to ensure structural integrity. - Installing Underlayment
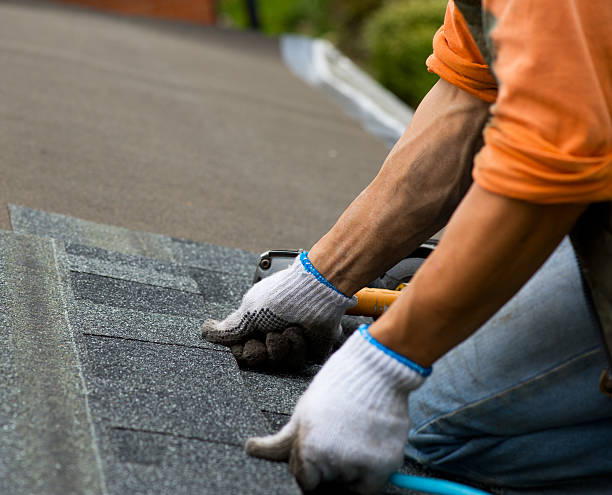
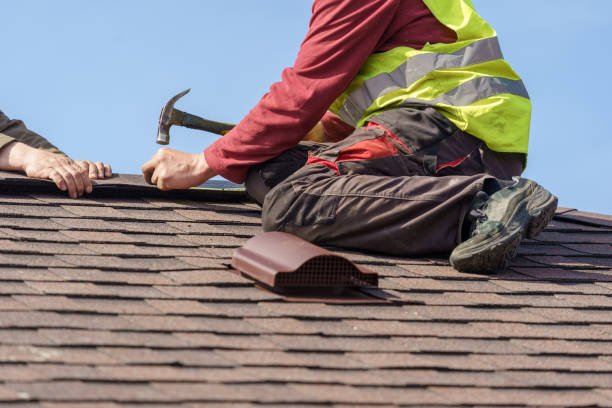
A water-resistant underlayment is applied over the decking for added protection against moisture infiltration. - Installing New Roofing Material
The chosen roofing material (e. g. , shingles or metal panels) is carefully installed according to manufacturer specifications for longevity and performance. - Final Checks & Cleanup
After installation is complete, contractors conduct a final inspection to verify quality work before cleaning up debris from your property.
Benefits of Working with Experienced Roofers
Hiring qualified professionals ensures that your residential roofing project adheres to industry standards while maximizing durability and efficiency.
- Knowledge of local building codes.
- Access to high-quality materials.
- Warranty-backed workmanship.
- Expertise in identifying hidden issues during inspections.
Maintenance Tips Post-Replacement
- Inspect annually for damaged shingles or tiles.
- Clean gutters regularly to prevent water buildup.
- Trim overhanging branches that could cause damage during storms.
- Address minor repairs promptly before they escalate into bigger problems.
Investing time into understanding residential roofing replacement ensures you can make informed decisions about one of the most vital components of your home’s structure.
Key Steps for a Successful Roof Replacement with a Minneapolis MN Roofing Contractor
A proper roof installation process is essential to ensure the durability and effectiveness of your new roofing system. Make sure you hire a roofing contractor who is an expert in their craft, like https://www.minneapolisroofingexperts.com. Below is a detailed breakdown of the critical steps involved in replacing a roof to ensure long-lasting results and structural integrity.
Before any physical work begins, it’s crucial to assess the existing roof condition thoroughly.
– Identifying underlying damage: Check for leaks, mold, or structural issues that may need repair before installing a new roof.
– Choosing suitable materials: Select roofing materials based on climate, budget, and aesthetic preferences (e. g. , asphalt shingles, metal, tile).
– Obtaining necessary permits: Ensure compliance with local building codes by securing the required permits for roof replacement.
Proper planning reduces unexpected delays and costs during the installation process.
The removal of old shingles or roofing materials is a crucial step in preparing for installation.
– Using specialized tools to strip away shingles layer by layer.
– Collecting debris to maintain a clean worksite while ensuring safety.
Pro Tip:Always inspect the underlayment after removing old materials to determine if additional repairs are necessary.
Once old materials are removed, the roof deck (also known as sheathing) needs inspection for any signs of deterioration or rot.
– Checking for weak spotsthat could compromise structural support. – Replacing damaged sections with new plywood or sheathing boards.
A solid foundation ensures your new roofing system will remain durable over time.
Underlayment serves as an added layer of protection against moisture infiltration beneath your shingles or tiles.
1. Rolling out waterproof underlayment across the surface of the roof deck. 2. Using nails or staples to secure it without leaving gaps. 3. Installing flashing around chimneys, vents, valleys, and edges to prevent water penetration.
Flashing is especially important in areas prone to heavy rainfall or snow accumulation.
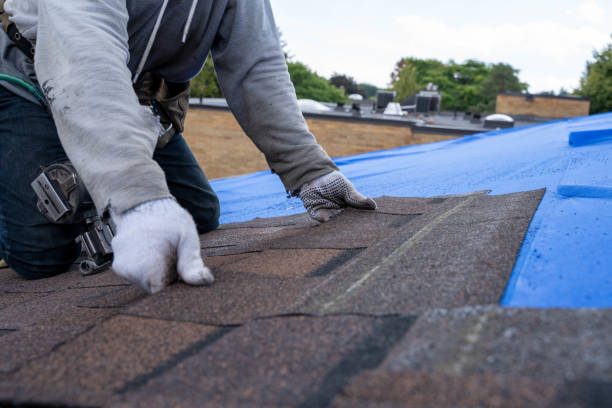
Depending on your chosen material type (e. g.
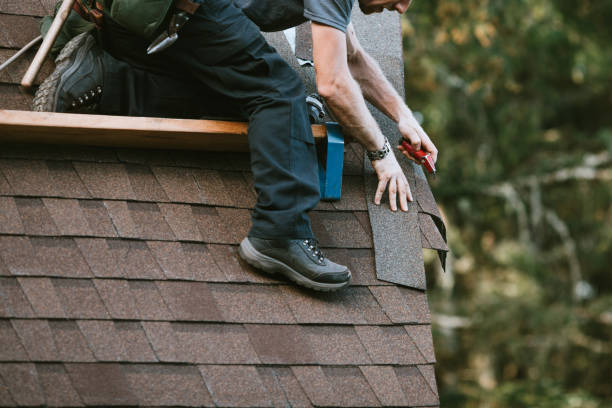
– Start from one edge of the roof (typically at the bottom) and work upward in overlapping rows. – Use nails or adhesive fasteners specifically designed for your chosen material. – Cut sections precisely around obstacles like skylights or vents using professional-grade tools.
Proper layering techniques prevent water from seeping into vulnerable areas during wet conditions.
After all materials have been installed, conduct a thorough inspection to verify that every element has been properly secured:
| Inspection Focus | What to Look For |
|——————-|——————|
| Shingle Alignment | Straight lines without visible gaps |
| Fasteners | Properly driven nails flush with surfaces |
| Flashing Seals | No visible gaps around chimneys/vents |
This final step ensures your new roofing system meets safety standards while providing long-term peace of mind.
By following these steps systematically and engaging experienced professionals when needed, you can achieve an efficient replacement process that enhances both functionality and aesthetic appeal of your property’s exterior structure.
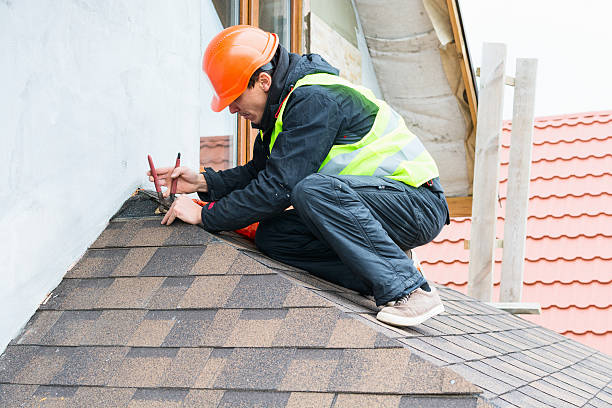
The Importance of Hiring a Minneapolis MN Roofing Contractor for Thorough Roof Inspections Before Installation
A thorough roofing inspection is a critical step in ensuring the success and longevity of any new roof installation. Skipping this process can lead to costly repairs, structural damage, and premature roof failure. Below is a detailed overview of why roofing inspections are essential, what they involve, and how to carry them out effectively.
Why a Roofing Inspection Matters
- Identifying Hidden Issues
A professional inspection can uncover hidden problems such as water damage, mold growth, or rot that might not be visible from the surface. Addressing these issues before installing new roofing materials ensures a stable foundation for your roof. - Extending Roof Longevity
A properly inspected and prepared roof surface helps the new roofing materials perform optimally, maximizing their lifespan and reducing long-term maintenance costs. - Saving Money Over Time
Catching minor damages early during an inspection prevents small issues from turning into expensive repairs after installation. - Ensuring Safety
A compromised structure can pose risks to both installers and property owners. Inspections ensure that the underlying roof is safe for construction projects.
Components of a Comprehensive Roofing Inspection
- Check for broken or missing shingles.
- Look for signs of sagging or uneven surfaces.
- Inspect flashing around vents, chimneys, and skylights for wear or rust.
- Assess gutters for blockages or detachment issues that could impact drainage.
- Inspect attic spaces for leaks or water stains on rafters.
- Look for light penetration through the decking, indicating gaps or cracks.
- Check insulation conditions to ensure it hasn’t been compromised by moisture.
- Evaluate the stability of trusses and supports.
- Look for areas with excessive weight strain due to pooling water or debris buildup.
Tools & Techniques Used in Roof Inspections
| Tool/Technique | Purpose |
| Binoculars/Drone Cameras | To assess hard-to-reach areas |
| Moisture Meters | Detect hidden moisture under layers |
| Flashlight | Illuminate dark attic spaces |
| Measuring Tape | Assess dimensions and slopes |
Professionals may also conduct core samples to analyze the condition of existing materials more deeply when necessary.
Preparing Your Roof After an Inspection
- Address all detected issues such as replacing rotted sections or repairing damaged flashing.
- Remove old materials like shingles if required by local building codes.
- Ensure proper ventilation systems are in place according to manufacturer recommendations and climate conditions.
Completing these steps guarantees your roof will be ready to support its new layers effectively while mitigating risks of future failures. Investing in this preliminary stage is one of the most reliable ways to safeguard your property’s structural integrity over time while ensuring top-notch results on your roofing project.
Essential Steps for a Durable Minneapolis MN Roof Replacement
Proper preparation of the roof surface is a critical step in ensuring a long-lasting and durable roofing system. Skipping or rushing this stage can lead to structural issues, water damage, or premature failure of the shingles. Below, we’ll outline the essential steps involved in preparing your roof surface for shingle installation.
1.Remove Old Roofing Materials
Before installing new shingles, it is essential to remove all old roofing materials, such as existing shingles, nails, and underlayment. This process ensures a clean and even surface for the new roof.
- Use specialized tools like roofing scrapers or pry bars to efficiently strip away old materials.
- Inspect all removed materials for signs of water damage or mold to identify potential underlying issues.
- Dispose of removed debris according to local regulations.
2.Inspect and Repair the Roof Deck
The roof deck acts as the foundation for your shingles and must be in excellent condition before proceeding with installation.
- Check for rot or structural damage on wooden decking.
- Replace any compromised sections of decking to maintain structural integrity.
- Secure loose decking panels with appropriate fasteners to prevent movement over time.
| Issue | Solution |
| Rotting wood | Replace affected sections entirely |
| Loose panels | Fasten with screws or nails |
| Water stains/mold | Treat with anti-mold solutions; replace if necessary |
3.Clean and Smooth the Surface
The surface should be free of debris and imperfections that might hinder proper shingle adhesion or alignment.
- Sweep off all dust, dirt, and small debris using a broom or air blower.
- Sand down any uneven areas on the roof deck.
- Ensure no nails or fasteners are protruding above the surface level; hammer them flush if necessary.
4.Install Drip Edge (Optional)
Installing drip edges along the eaves provides additional protection against water infiltration beneath the shingles.
Benefits of adding a drip edge: – Redirects water flow away from fascia boards. – Prevents water from seeping under shingles at edges.
5.Lay Down Roofing Underlayment
Underlayment is a protective layer placed between the roof deck and shingles to provide an additional barrier against moisture.
Key considerations when installing underlayment: 1. Choose between synthetic or felt underlayment based on your climate and budget requirements. 2. Begin laying it out from the bottom edge of the roof upward, overlapping each course by at least 2 inches. 3. Secure it using cap nails spaced according to manufacturer recommendations. 4. Ensure there are no bubbles or wrinkles that could disrupt shingle placement.
Final Thoughts
Taking time to properly prepare your roof surface sets a strong foundation for successful shingle installation.
Expert Tips on Minneapolis MN Roof Repair and Choosing Durable Roofing Materials
Installing new roofing materials is a critical process that requires precision, expertise, and attention to detail. Whether you’re a professional roofer or a DIY enthusiast, following best practices during installation can significantly impact the durability, efficiency, and longevity of your roof. Below are expert tips to ensure your roofing installation delivers lasting results.
Choose the Right Roofing Materials
Selecting the appropriate roofing material is fundamental to the success of your project. Consider factors such as climate, budget, and architectural style when making your choice.
- Asphalt Shingles: Affordable and versatile but with moderate lifespan.
- Metal Roofing: Durable, fire-resistant, and energy-efficient.
- Clay or Concrete Tiles: Highly durable but heavier and more expensive.
- Slate Roofing: Long-lasting and attractive but requires solid structural support.
Always choose high-quality materials to minimize repairs and maintenance down the road.
Proper Ventilation for Your Roof
Ventilation plays a crucial role in prolonging the life of roofing materials. Poor ventilation can lead to issues such as trapped moisture, which causes mold growth and weakens structural components.
- Install ridge vents or soffit vents.
- Ensure proper airflow in attics or underlayment spaces.
- Use breathable underlayment for additional moisture control.
A well-ventilated roof is less likely to develop costly problems over time.
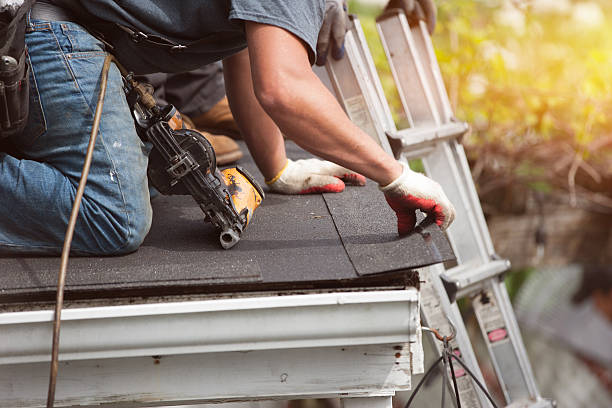
Nail Placement and Fastening Techniques
Proper nailing techniques are essential for securing roofing materials effectively. Misplaced nails can lead to leaks or loose shingles that compromise your roof’s integrity over time.
- Use nails of appropriate length based on material thickness.
- Avoid overdriving nails; they should sit flush with the shingle surface.
- Position nails correctly (typically 1 inch from each side edge of shingles).
Attention to detail during nailing ensures stability even under harsh weather conditions.
Waterproofing Measures
Water damage is one of the most common causes of early roof failure.
- Apply ice and water shield at roof edges, valleys, and other vulnerable areas.
- Use high-quality synthetic underlayment instead of traditional felt paper for better resistance against water penetration.
- Ensure proper sealing around chimneys, vents, skylights, and other roof openings.
These extra steps can make all the difference in maintaining a watertight roof structure.
Inspect Your Work
Once all materials are installed, thoroughly inspect every aspect of your work before declaring it complete.
- Misaligned shingles or tiles.
- Loose fasteners that need tightening.
- Properly installed flashing around edges.
A final inspection ensures no errors were overlooked during installation.
| Step | Key Focus Area | Importance |
| Material Selection | Choosing durable materials suited to climate | Reduces future maintenance costs |
| Ventilation | Ensuring consistent airflow | Prevents moisture buildup |
| Nailing Techniques | Correct placement & secure fastening | Increases structural integrity |
| Waterproofing | Ice shields & proper seals | Protects against leaks |
| Final Inspection | Verifying proper alignment & sealing | Ensures long-term reliability |
By adhering to these expert tips during installation, you’ll achieve not only a functional but also an enduring roof that withstands time and environmental challenges effectively—an investment worth every effort made upfront.
Key Signs You Need Minneapolis MN Roof Installation and Why It’s Important
A well-maintained roof is critical to protecting your home, enhancing its value, and ensuring the safety of its occupants. Over time, however, even the most durable shingle roofs can deteriorate due to weather, age, or poor maintenance. Recognizing when it’s time to replace your shingle roofing can save you money and prevent costly damage to your home. Below are some important signs that indicate new shingle roofing may be needed and why addressing these issues promptly matters.
Signs You Need New Shingle Roofing
- Shingles that are curling at the edges or buckling in the middle are a clear indication of wear and tear.
- This occurs due to prolonged exposure to moisture, heat, or age-related degradation.
- Damaged shingles leave your roof vulnerable to water penetration.
- High winds or storms can dislodge shingles, leaving gaps in your roof’s protection.
- Missing shingles expose the underlayment and decking to the elements, increasing the risk of leaks.
- Granule loss reduces UV protection for your roof and diminishes its water-shedding capabilities.
- A sagging roof is a severe issue caused by structural damage or rotting decking beneath the shingles.
- This is a sign of significant deterioration that requires immediate attention.
- Stains on ceilings or walls can indicate a leaking roof caused by damaged shingles.
- Left untreated, water intrusion can lead to mold growth and structural issues.
- Most asphalt shingle roofs have a lifespan of 20-25 years depending on maintenance and weather conditions.
Why Addressing These Issues Matters
- Prevent Structural Damage:Prolonged exposure to moisture from leaks can compromise wooden structures like rafters and beams over time. Replacing worn shingles prevents this from happening.
- Improve Energy Efficiency:Old or damaged roofing materials allow heat transfer between your attic and living spaces, driving up energy costs. Properly installed new shingles improve insulation properties.
- Enhance Curb Appeal:A deteriorating roof detracts from your home’s overall appearance while lowering property value significantly.
- Avoid Emergency Repairs:Timely replacement eliminates unexpected emergencies like major leaks during heavy rainstorms.
Benefits of Installing New Shingle Roofing
| Benefit | Description |
| Enhanced Durability | Modern shingles are designed for better weather resistance against wind/rain |
| Increased Property Value | A new roof adds curb appeal & increases resale potential |
| Improved Safety | Eliminates risks associated with sagging structures |
| Better Warranty Options | Manufacturers often offer updated warranties with newer materials |
Recognizing these warning signs early ensures you maintain the integrity of your home while avoiding unnecessary stress associated with emergency repairs. Always consult with professional roofing contractors for an inspection before deciding on replacement options tailored specifically for your home’s needs.
Ready for a New Roof?
Embarking on a roofing replacement project can feel like a daunting task, but with the right preparation and guidance, the process becomes more manageable and efficient. A clear step-by-step approach ensures that homeowners are well-informed and ready to tackle this important home improvement investment. Below is a detailed guide to help you get started on your new roof journey.
Step 1: Evaluate the Condition of Your Existing Roof
Before initiating the process, it’s essential to determine whether your roof truly requires replacement.
- Curling or missing shingles:This indicates that shingles are nearing the end of their lifespan.
- Water leaks or stains:Water damage inside your home may point to deteriorated roofing.
- Sagging roof deck:Structural issues often necessitate immediate attention.
- Age of your roof:Most asphalt shingle roofs last 20-25 years, depending on weather conditions and maintenance.
If you notice any of these issues, it’s time to consider replacing your roof. Consulting with a professional roofer can provide further clarity.
Step 2: Choose the Right Materials for Your Roof
Selecting materials is one of the most critical steps in ensuring longevity, durability, and aesthetics for your new roof.
| Material | Lifespan | Cost Range (Per Sq Ft) | Benefits |
| Asphalt Shingles | 20-30 years | $3-$5 | Affordable, versatile, and widely available |
| Metal Roofing | 40-70 years | $5-$15 | Durable, energy-efficient, low maintenance |
| Clay Tiles | 50+ years | $7-$20 | Long-lasting and resistant to extreme temperatures |
| Slate Roofing | 75+ years | $10-$30 | Elegant appearance with exceptional durability |
Each material has unique advantages. Consider factors like budget, climate conditions in your area, and overall aesthetic preferences when making your decision.
Step 3: Hire a Reliable Roofing Contractor
A professional roofer plays an integral role in ensuring the quality of your new roof installation.
- Look for proper licensing and insurance.
- Check online reviews and testimonials from previous clients.
- Request multiple quotes to compare pricing and services offered.
- Ask about warranties provided for both materials and labor.
Hiring an experienced contractor ensures safety during installation and enhances long-term performance.
Step 4: Plan Your Budget
Roof replacement is a significant financial investment.
- Obtain detailed estimates from multiple contractors.
- Account for additional costs such as permits or structural repairs.
- Set aside approximately 10% extra as a contingency buffer in case of unforeseen issues.
Proper budgeting prevents financial stress during the project.
Step 5: Prepare Your Home for Installation Day
- Clear out valuables from attics or rooms directly under the roof as vibrations might displace items.
- Remove vehicles from driveways where debris may fall during construction.
- Notify neighbors about potential noise disruptions caused by machinery or hammering.
Being prepared minimizes disruptions during installation while ensuring safety for everyone involved.
By following this guide step by step, you’ll be equipped with all necessary information to confidently approach replacing your roof effectively while achieving optimal results tailored specifically to meet both functional needs & aesthetic aspirations homeowners often prioritize when considering such upgrades.
- Minneapolis Roofer Tips: A Comprehensive Guide to Roofing Replacement
- The Complete Guide to Choosing a Minneapolis MN Roofing Contractor for Your Roof Replacement
- How a Minneapolis Roofer Can Help Identify Water Damage from a Roof Leak and What to Do Next
- Thorough Guide to Minneapolis MN Roof Replacement and Inspecting for Leaks
- Key Factors to Consider When Choosing a Minneapolis MN Roofing Contractor
- Comprehensive Guide to Minneapolis MN Roof Repair and Installation Process
- Understanding Minneapolis MN Roof Installation: When to Replace Your Roof, Signs, and Costs